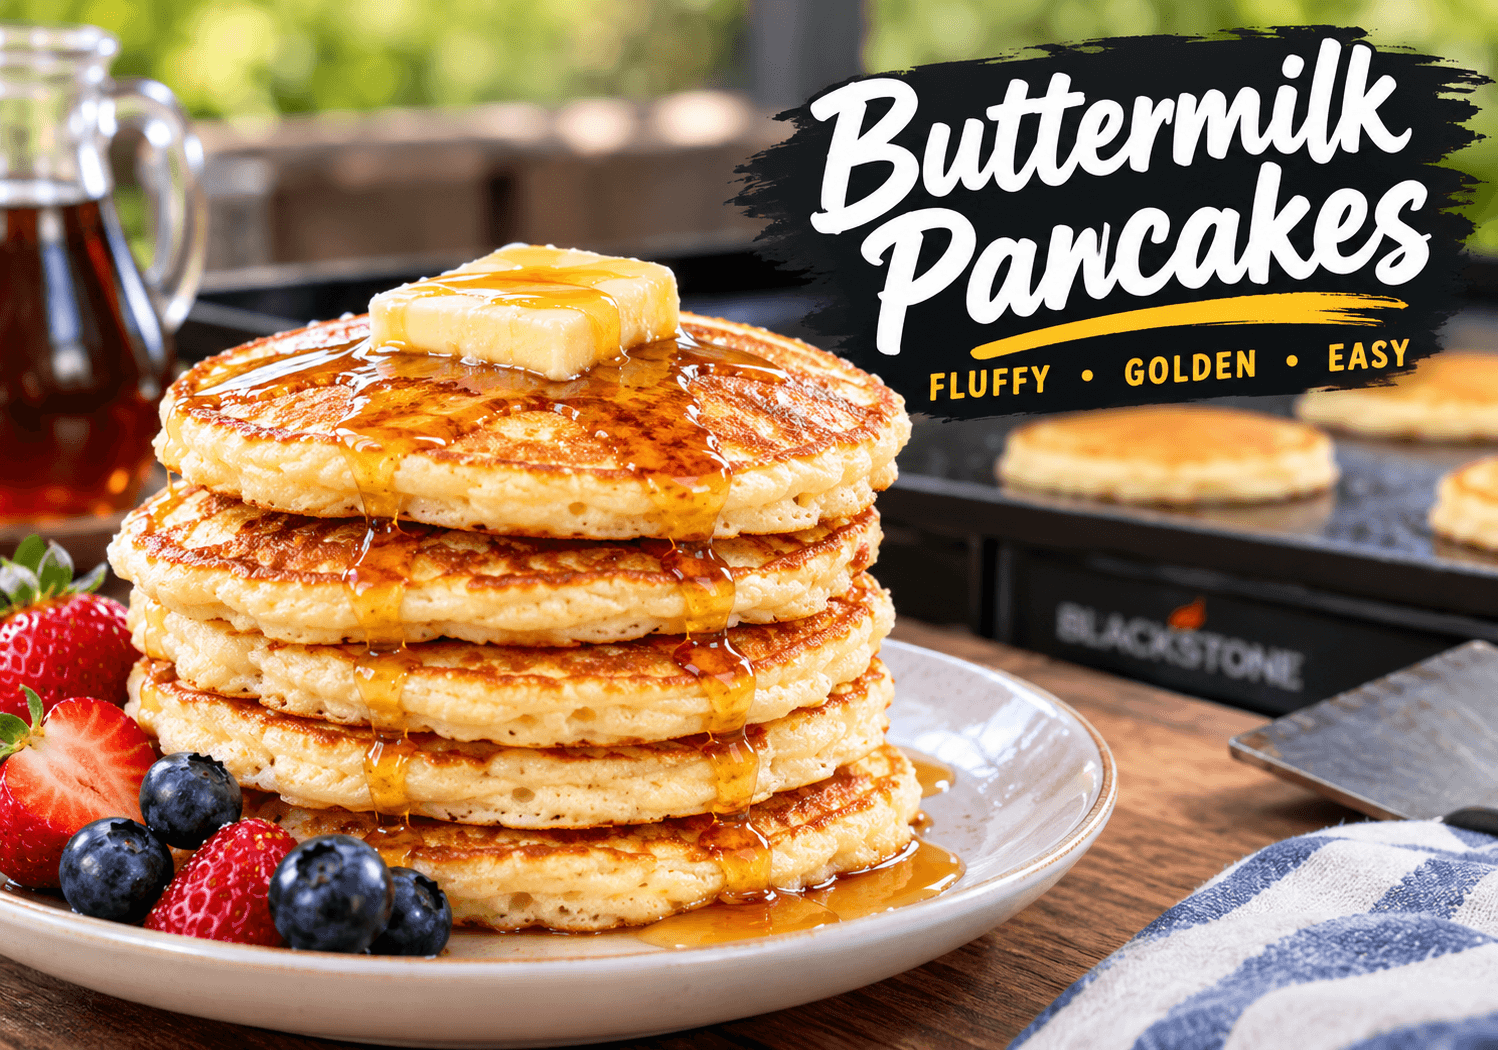
Great buttermilk pancakes are tall and tender, with crisp, lacy edges and a soft, airy middle. They are also one of the easiest things to cook on a flat top, as long as you control three things: how you mix the batter, how hot the surface is, and when you flip. This guide gives you a reliable method for fluffy buttermilk pancakes on a Blackstone, a cast iron skillet, or an electric griddle, with exact temperatures, times, and fixes.
The secret is the buttermilk itself. Its acid reacts with baking soda to make bubbles that lift the batter, and it softens the flour so the crumb stays tender. That is why buttermilk pancakes taste slightly tangy and rise taller than pancakes made with plain milk.
This recipe makes about 12 four-inch pancakes and serves four. Prep takes 15 minutes and cooking takes about 15 more. The method scales up easily for a crowd on a large griddle.
Quick Answer: For the best buttermilk pancakes, whisk flour, buttermilk, eggs, and leaveners into a lumpy batter and rest it 10 minutes. Cook on a 350–375°F (175–190°C) griddle: 2–3 minutes on the first side, 1–2 on the second. Total time is about 30 minutes. Pancakes are done when set in the center (160°F / 71°C for egg dishes).
Why These Buttermilk Pancakes Work
Good pancakes come from simple chemistry and heat control, not luck. Each choice in this recipe has a job:
- Two leaveners. Baking soda reacts with the buttermilk’s acid right away. Baking powder adds a second lift once the batter hits the heat.
- Melted butter. It adds flavor and tenderness. Cooling it first keeps it from scrambling the eggs.
- A lumpy batter. Stirring builds gluten. Overmixed batter makes rubbery, flat pancakes.
- A 10-minute rest. The flour absorbs the liquid, and the batter thickens so it holds its shape on the griddle.
- Moderate heat. A surface of 350–375°F (175–190°C) browns the outside while the center sets.
- Only 2 tablespoons of sugar. That is enough for color and flavor, but not enough to burn before the middle cooks.
Ingredients and Equipment for Buttermilk Pancakes
Makes about 12 four-inch pancakes. Serves 4.
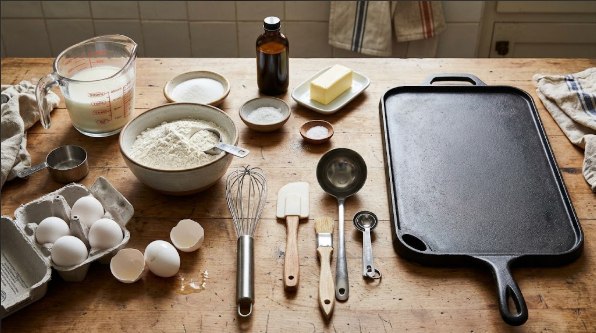
Ingredients
- 2 cups all-purpose flour (about 0.55 lb / 0.25 kg, or 250 g), spooned into the cup and leveled
- 2 tablespoons granulated sugar (25 g)
- 2 teaspoons baking powder
- ½ teaspoon baking soda
- ½ teaspoon fine salt
- 2 cups buttermilk (16 fl oz / 480 ml), shaken well
- 2 large eggs
- 4 tablespoons unsalted butter (⅛ lb / 0.06 kg), melted and slightly cooled
- 1 teaspoon vanilla extract (optional)
- Butter or a high-smoke-point oil such as canola or avocado, for the griddle
Equipment
- Griddle, flat top, or 12-inch cast iron skillet
- Large mixing bowl and a whisk
- ¼-cup measure or a #16 scoop
- Wide, thin spatula
- Infrared thermometer (the fastest way to read griddle surface heat) and an instant-read thermometer
- Sheet pan, wire rack, and an oven set to 200°F (93°C) for holding finished batches
Surface area matters when you feed a crowd, because a bigger griddle means fewer batches and less waiting. If you are still choosing, our Blackstone 22 vs 28 inch comparison walks through the trade-offs.
Substitutions
| If you do not have | Use this | Notes |
| Buttermilk | 2 tablespoons lemon juice or white vinegar, plus whole milk to make 2 cups. Let it stand 5–10 minutes. | Slightly thinner and less tangy than cultured buttermilk |
| Buttermilk (option 2) | 1½ cups plain yogurt thinned with ½ cup milk | Thicker batter; add a splash of milk if it will not pour |
| All-purpose flour | Replace up to half with whole wheat flour | Add 2 tablespoons extra buttermilk; the stack will be denser |
| Butter in the batter | 3 tablespoons neutral oil | Less flavor, but still tender |
| Dairy and eggs | See our vegan breakfast ideas for plant-based options | Results differ from this recipe |
Choosing and Prepping Your Ingredients
Flour. Dipping the cup straight into the bag packs in extra flour and makes dry, cakey pancakes. Spoon the flour into the cup and level it, or weigh out 250 g.
Buttermilk. Use cultured buttermilk and shake the carton, because it separates. Pull it from the fridge 20–30 minutes early. Ice-cold buttermilk turns melted butter into clumps.
Eggs and butter. If your eggs are very cold, set them in a bowl of warm tap water for 5 minutes. Keep eggs refrigerated until you cook, and follow the USDA FSIS guidance on shell eggs: cook eggs until firm and cook foods containing eggs thoroughly. Raw pancake batter contains raw egg, so do not taste it.
The griddle. Scrape and wipe the surface before you start. If you cooked bacon or sausage first, leftover bits will burn and leave dark specks on the pancakes.
Step-by-Step Instructions
- Preheat the griddle (8–10 minutes). Set a griddle or flat top to medium-low, then check the surface with an infrared thermometer. You want 350–375°F (175–190°C). Every cooker runs differently, so trust the number and the first test pancake, not the dial. For a skillet, heat over medium for about 5 minutes. For an electric griddle, set it to 350°F (175°C).
- Melt the butter. Melt 4 tablespoons, then let it cool 3–5 minutes so it is warm, not hot.
- Whisk the dry ingredients. In a large bowl, whisk the flour, sugar, baking powder, baking soda, and salt for 20 seconds. This spreads the leaveners evenly so you do not get bitter pockets of baking soda.
- Whisk the wet ingredients. In a second bowl or large measuring cup, whisk the buttermilk, eggs, and vanilla. Slowly whisk in the cooled butter. Small flecks of butter are fine.
- Combine gently. Pour the wet mixture into the dry. Fold with a spatula or whisk for 10–12 strokes, just until the dry flour disappears. Leave lumps about the size of peas.
Rest the batter 10 minutes (up to 20). It will thicken and show tiny bubbles. Do not stir it again. Good batter drops off a spoon in a thick, slow ribbon. If it feels like paste, stir in 1–2 tablespoons of buttermilk. - Grease lightly. Brush on a thin film of oil or butter, then wipe most of it off with a folded paper towel. The surface should look glossy, not wet. Too much fat fries the edges and makes blotchy color.
- Pour the batter. Pour ¼ cup per pancake, leaving about 2 inches (5 cm) between them. Treat the first one as a test. If it browns in under 90 seconds, lower the heat and wait two minutes.
- Wait for the flip signal (2–3 minutes). Bubbles rise across the top and pop, leaving holes that stay open. The edges turn dry and matte. Slide the spatula under one and peek. The bottom should be an even golden brown.
Flip once. Flip in one quick motion and leave it alone. Do not press down. Cook 1–2 minutes more, until the pancake springs back when you tap the center. - Hold warm. Move finished pancakes in a single layer to a wire rack set over a sheet pan in the 200°F (93°C) oven. The USDA says to keep hot food at 140°F or above so it stays out of the danger zone. Stacking traps steam and turns the crust soggy.
- Repeat. Wipe the griddle, add a thin film of fat, and cook the remaining batter. Later batches often cook a little faster as the surface holds more heat, so watch the color.
Pitmaster Tip: Use the first pancake as your thermometer. Pale after 3 minutes means the surface is too cool. Dark in 60–90 seconds means it is too hot. Adjust the heat, wait two minutes, and test again. That five minutes of fiddling saves the whole batch.
Common Mistake: Mixing until the batter is smooth. Beating out every lump builds gluten, and the buttermilk pancakes turn chewy and flat. Stop while the batter still looks lumpy.
Time and Temperature Table for Buttermilk Pancakes
| Stage | Temperature | Time | What to look for |
| Preheat griddle | 350–375°F (175–190°C) surface | 8–10 min | A flick of water skitters and vanishes fast |
| Rest batter | Room temperature | 10–20 min | Thick batter with tiny bubbles |
| First side | 350–375°F (175–190°C) | 2–3 min | Open bubbles, dry matte edges, golden underside |
| Second side | 350–375°F (175–190°C) | 1–2 min | Springy center, even golden color |
| Oven hold | 200°F (93°C) | Up to 30 min | Single layer on a wire rack |
| Total cooking time | n/a | 15–20 min for 12 pancakes | Cooked in 3–4 rounds on a standard griddle |
How to Tell When Buttermilk Pancakes Are Done
Use three checks: look, touch, and temperature.
- Look. Both sides are golden, the edges are set and straight, and no wet, shiny batter shows at the sides.
- Touch. The center springs back under a light finger tap. Cut into the thickest pancake. The inside should look moist and steamy, not gooey or translucent.
- Temperature. The USDA’s safe minimum internal temperature chart lists 160°F (71°C) for egg dishes. Most cooks judge pancakes by sight, but sliding an instant-read thermometer sideways into the thickest pancake settles any doubt. Apply that guideline to the center.
Common Mistake: Pulling pancakes the moment they look golden. A pancake can brown on the outside while the middle is still wet. Give the second side its full 1–2 minutes and check the center.
Resting, Slicing, and Serving Buttermilk Pancakes
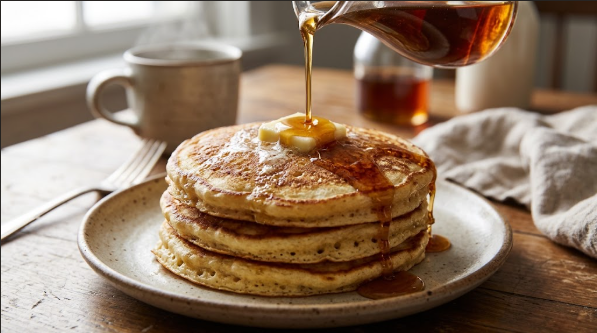
Pancakes do not need a long rest, but give them one minute on the rack so extra steam escapes. That keeps the surface crisp instead of damp. Serve three per plate while hot, with a pat of butter melting on the top one.
Warm the syrup for 20–30 seconds in the microwave or in a small pan, because cold syrup cools the stack fast. Pour it at the table so the crust stays crisp as long as possible. A stack cuts cleanly into wedges with a sharp knife.
What to Serve with Buttermilk Pancakes
These pancakes are mild and slightly tangy, so they pair well with salty, smoky, and fruity partners.
- Smoky meats. Hickory-smoked bacon and breakfast sausage are the classic match. If you cook them on the same griddle, do it first and scrape the surface clean before the batter goes down.
- Eggs. Scrambled or over-hard eggs, cooked until firm, add protein and balance the sweetness.
- Butter upgrades. A pat of smoked butter adds a gentle campfire note that works well with maple syrup.
- Fruit. Fresh blueberries, sliced strawberries, or sauteed apples brighten the plate. For a dessert-style brunch, spoon Blackstone bananas foster over the stack.
- Crunch. Toasted pecans or crispy hash browns add texture against the soft crumb.
For a full spread, browse our easy breakfast recipes and pick one or two sides.
Storing, Freezing, and Reheating Leftover Buttermilk Pancakes
Refrigerate. Cool the pancakes on a wire rack, then refrigerate them within two hours (one hour if the air is above 90°F / 32°C), as the USDA FSIS leftovers guidance advises. Layer them with parchment in an airtight container. Illinois Extension recommends using refrigerated leftovers within 3–4 days.
Freeze. Freeze the pancakes in a single layer on a parchment-lined sheet pan for about an hour. Then move them to a freezer bag and press out the air. Frozen leftovers stay safe, but quality drops over time, and the same Illinois Extension page suggests using them within 3–4 months.
Reheat to 165°F (74°C). The USDA says leftovers should reach 165°F as measured with a food thermometer, and frozen leftovers can be reheated without thawing, though it takes longer. Choose the method you prefer:
- Oven or toaster oven: 350°F (175°C) on a wire rack, 8–10 minutes from the fridge or 12–15 minutes from frozen. This gives the best texture.
- Skillet: Medium-low heat with a lid, 1–2 minutes per side.
- Toaster: Works well for frozen pancakes; run another cycle if the center is cold.
- Microwave: About 30–45 seconds for two pancakes, covered. It is fast but softens the crust.
Make-ahead tip. Baking soda starts reacting with buttermilk right away, so batter made the night before loses lift. Mix the dry ingredients ahead in a jar instead, and add the wet ingredients when you are ready to cook.
Variations: Griddle, Pellet Grill, Charcoal, and Oven
Big Blackstone or Flat-Top Batches
The same temperatures and times apply, and you can double or triple the batter. Run a hot zone for cooking and a low zone for holding finished pancakes. If you cook for a big family often, our Blackstone 28 vs 36 inch guide helps you pick the right size.
Pellet Grill
Set the pellet grill to 400°F (205°C) with a cast iron griddle or skillet on the grate and preheat about 15 minutes. Grate temperature and pan surface temperature differ, so check the pan with an infrared thermometer and aim for 350–375°F (175–190°C). Use light fruitwood pellets such as apple if you want a trace of smoke. Leave the lid open while you flip
Charcoal Grill
Build a two-zone fire and set a cast iron skillet over the medium-heat side. Cook the pancakes the same way, and move the skillet to the cooler side if the surface climbs above 375°F (190°C). Charcoal heat swings more than gas, so test with the first pancake every time.
Oven Backup
For a hands-off option, pour the batter into a greased rimmed half sheet pan and bake at 425°F (220°C) for about 12–15 minutes, until the top is set and golden, then cut into squares. The edges will not be as crisp as griddle pancakes.
Add-Ins and Lighter Versions
Sprinkle ¾ cup of blueberries or ½ cup of chocolate chips onto each pancake right after pouring, instead of stirring them into the batter. This keeps the batter from turning purple or sinking. For a heartier stack, swap in whole wheat flour as shown in the substitutions table. For lighter spreads, see our healthy breakfast ideas.
Troubleshooting Buttermilk Pancakes
| Problem | Likely cause | Fix |
| Flat, dense pancakes | Overmixed batter; old baking powder or soda | Mix just until combined; replace leaveners that are old or were opened long ago |
| Gummy or raw center | Surface too hot or batter too thick | Drop to 350°F (175°C); thin the batter with 1–2 tablespoons buttermilk; cook the second side an extra minute |
| Pale, no browning | Surface too cool or too much fat | Raise the heat about 25°F; wipe off excess fat |
| Dark outside, raw inside | Heat too high; sugar scorching | Lower the heat, wait two minutes, and retest |
| Tough, chewy texture | Overmixing | Fold 10–12 strokes and leave lumps |
| Few bubbles | Weak leaveners; thin batter; cold surface | Use fresh baking powder; add 1–2 tablespoons flour if thin; recheck the surface temperature |
| Pancakes spread too thin | Batter too thin | Rest the batter longer or add 1–2 tablespoons flour |
| Sticking to the griddle | Not preheated or too little fat | Preheat fully, wipe on a thin film of fat, scrape between batches |
| Metallic or soapy taste | Too much baking soda or unmixed pockets | Measure level and whisk the dry ingredients for 20 seconds |
| Soggy after holding | Stacked or covered | Hold in a single layer on a wire rack |
Buttermilk Pancakes Recipe Card
Servings: 4 (about 12 four-inch pancakes) | Prep: 15 min (batter rests while the griddle heats) | Cook: 15–20 min | Total: about 30 min | Griddle surface: 350–375°F (175–190°C)
Ingredients: 2 cups (250 g) all-purpose flour; 2 tablespoons sugar; 2 teaspoons baking powder; ½ teaspoon baking soda; ½ teaspoon salt; 2 cups (480 ml) buttermilk; 2 large eggs; 4 tablespoons (57 g) melted butter; 1 teaspoon vanilla; butter or oil for the griddle.
Steps:
- Preheat the griddle to 350–375°F (175–190°C).
- Whisk the dry ingredients. Whisk the buttermilk, eggs, and vanilla, then stream in the cooled butter.
- Fold the wet into the dry for 10–12 strokes. Leave lumps.
- Rest the batter 10 minutes.
- Grease lightly and pour ¼ cup per pancake.
- Flip when bubbles pop and edges look dry, 2–3 minutes.
- Cook 1–2 minutes more, until springy and golden.
- Hold on a rack in a 200°F (93°C) oven, then serve warm.
Buttermilk Pancakes FAQ
What makes buttermilk pancakes fluffy?
Fluffy pancakes come from two leaveners and gentle mixing. Buttermilk’s acid reacts with baking soda for fast bubbles, and baking powder lifts the batter again on the heat. Stop stirring while the batter is lumpy, rest it 10 minutes, and cook at 350–375°F (175–190°C) so the center sets as it rises.
What temperature should a griddle be for pancakes?
Aim for a surface temperature of 350–375°F (175–190°C). Use an infrared thermometer for a real reading, since dials vary. Cook a test pancake first. If it browns in under 90 seconds, the surface is too hot. If it is still pale after 3 minutes, turn the heat up slightly.
Can I make buttermilk pancakes without buttermilk?
Yes. Stir 2 tablespoons of lemon juice or white vinegar into a measuring cup, add whole milk to reach 2 cups, and let it stand 5–10 minutes. You can also thin plain yogurt with milk. The batter will be slightly less tangy, but the acid still activates the baking soda for lift.
Should pancake batter rest before cooking?
Yes, rest it 10 minutes, up to 20. Resting lets the flour absorb the liquid, so the batter thickens and cooks up tender instead of gritty. It also lets the leaveners start working. Do not stir again afterward, or you will knock out the bubbles that give the pancakes their lift.
Why are my buttermilk pancakes flat or gummy?
Flat pancakes usually mean overmixed batter or old baking powder or soda. Gummy centers mean the griddle is too hot, so the outside browns before the middle sets, or the batter is too thick. Mix until just combined, replace stale leaveners, and keep the surface at 350–375°F (175–190°C).
Can you freeze buttermilk pancakes?
Yes. Cool them on a rack, freeze in a single layer on a sheet pan for about an hour, then bag them with the air pressed out. Frozen leftovers stay safe, but quality drops over time. Reheat to 165°F (74°C), straight from the freezer if you like.
Conclusion: Better Buttermilk Pancakes Start with Heat Control
The best buttermilk pancakes come down to a handful of habits: measure the flour carefully, leave the batter lumpy, let it rest, and keep the griddle surface at 350–375°F (175–190°C). Watch for open bubbles and dry edges, flip once, and hold the batches on a rack in a 200°F (93°C) oven.
Once you have the rhythm, this recipe works on a Blackstone, a skillet, a pellet grill, or a charcoal fire. Make a batch this weekend, use the troubleshooting table if anything goes sideways, and freeze the extras for busy mornings.
Laura Smith

I'm Laura, I like all the kind of delicious grilled foods which makes me hungry all the time I see them. That's why I built this blog to share with you all of my Grilling experiences, recipes, and all the tips about foods that I've learned from food experts.